This guide is intended to get you up and running quickly with RouteFinder. It will allow you to create a network, adjust road speeds and then you can use the functionality that you need. When you are more familiar with the software you may want to create a new network using some advanced features, such as one way streets and turn restrictions, in your calculations.
You will need a topologically correct road network. There are such commercial datasets from TomTom, HERE and Ordnance Survey. You can also use Open Street Map and the UK Ordnance Survey free road dataset such as Meridian 2 and Open Roads. The minimum requirement is a numeric column that has a value between 0 and 31. This will be your road class column.
Open the network in MapInfo. Then start RouteFinder. You should be able to start RouteFinder by going to HOME > Tools > Registered / Tool Manager.
When you scroll down the tool list You should see RouteFinder 6.06 in the main box.
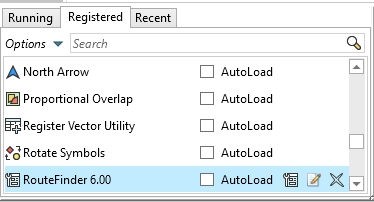
If you click on the load tool Icon, then the tool will be added to the MapInfo Ribbon.
To start you need to create a network - This function is in the first part of the RouteFinder Ribbon

You will then have the following dialog:
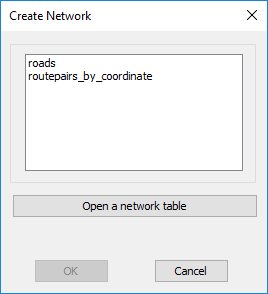
Select your network table from the list and press OK.
You will then get to pick the column with the 0-31 values.
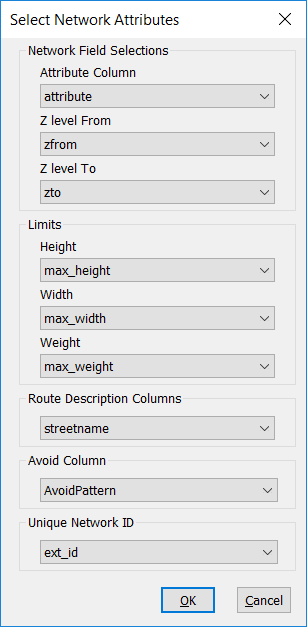
If you have used one of RouteWare standard translators then you might get values in the Attribute, Z Level From and Z level To fields.
If you do get those drop down boxes for z-levels filled in then it is fine to continue.
These fields just indicate links that form a part of a bridge or underpass and gives more accurate routing results.
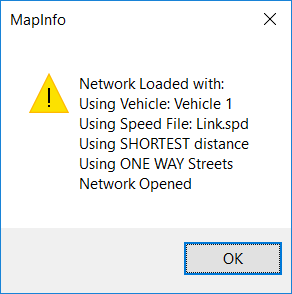
When you click OK the network files are created and the RouteFinder features are enabled.
You will see a message telling you options are set to by default.
More details can be found in the Creating a Network chapter.
The first step will be to input your roads speeds.
In order to do this you will need to know what number in the Attribute field relate to what kind of road.
E.g Class 1 might be a Motorway, Class 2 might be a major road and so on.
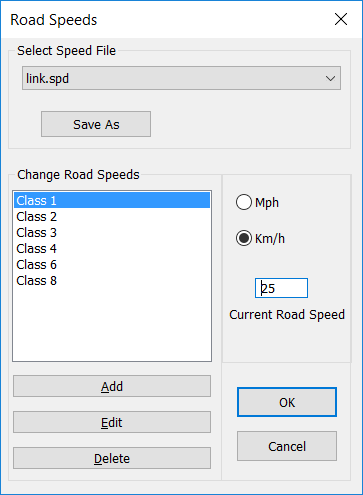
To change road speeds you would go to the Options > Set Road Speeds.
The following dialog is displayed:
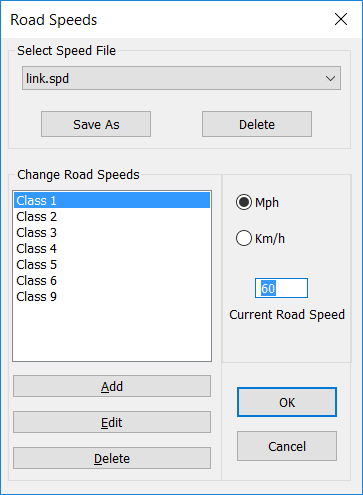
First select if you want Mph or Km/h.
To change a road speed click on a class and then input the required speed into current road speed box.
You can optionally also click the edit button to input a new name for the road class.
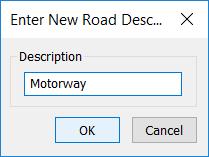
By doing this you can make the roads speeds name more understandable.
Further details of this function can be found in the Road Speed Options chapter
Once you have done this you are ready to start using the functions in RouteFinder. You can set the type of calculation you want to do by using Options > Route.
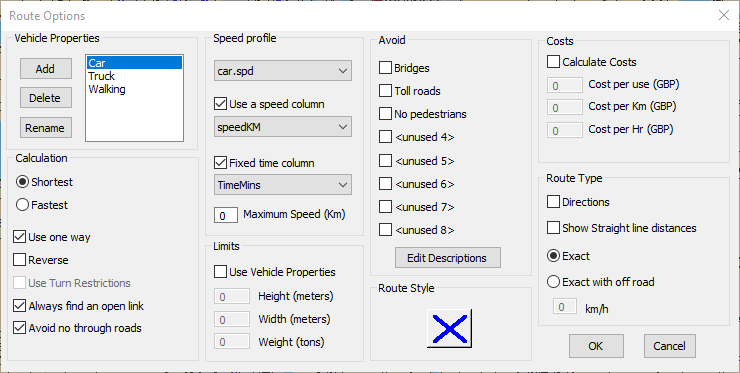
This is one of the major changes in the interface from previous version of RouteFinder. We now have the concept of a vehicle and that vehicle could have a number of properties such as using one way streets or calculating costs. Each vehicle can have its own speed file associated with it. So you can have a car that uses one set of speeds and a Heavy Goods Vehicle, which has a different speed file. This combined with the calculation of costs and the use of limits makes it very easy to calculate for vehicles with different uses. You can learn about the details of this dialog by looking at the Route Options chapter
In this dialog you can choose if you want shortest or fastest calculation type.
Please refer to the rest of the help file for information on how to use the tools in RouteFinder.