Installation steps
You should install MapInfo Professional before you install RouteFinder.
If a previous version of RouteFinder has been installed, you can leave it in place. Just make sure you install into different directories.
Now install RouteFinder by running the setup application. You must install RouteFinder and not copy it from another machine. You should have administration privileges to perform the installation.
After you have installed RouteFinder, open MapInfo and you will see RouteFinder 6.06 listed on the Home Tab > Tools > Registered pane (64-bit) or the Tool Manager (32-bit).
License file
The way RouteFinder is licensed has now changed. It is now licensed via a remote server with a serial number so you must have internet access available on the PC you are installing the software. It will generate a license file that is to be used by the current user only. This means that if you use the PC as a part of a job share then both users will need to activate the software. We allow a certain number of activations with each license – if however, the software does not activate then please contact RouteWare or Higher Mapping Solutions.
When RouteFinder is first started you will see the following dialog:
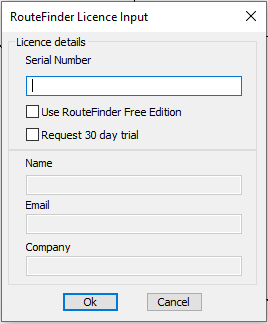
You have the option of requesting a 30 day trial of RouteFinder. If you would like to do this then tick the "Request 30 day trial". Fill in your name, company and email address. The system will automatically generate a license file that will work for 30 days and can be used on networks with up to 50,000 links. Once RouteFinder has been activated as a trial it will not be possible to ask for a trial on the same machine.
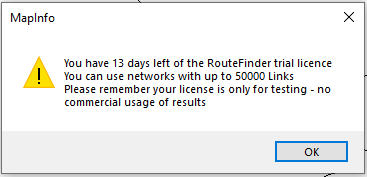
When you purchase a copy of RouteFinder you will receive a serial number. If you have got the serial number, then just put this into the first box and press OK. During the license period you will get a further message to remind you how many days of your trial you have remaining.
If you are running a trial and then purchase a full license, then you can click on the "New Serial" option on the main RouteFinder ribbon or menu and you will see the following dialog:
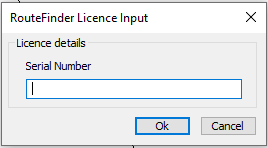
When you enter you serial number - it will be validated and, if correct, will give you full access to RouteFinder.
The license file will automatically be stored in the current users local folder - see "Settings Folder"
If no valid license is found, RouteFinder starts in "Free mode" with much reduced functionality:
It will only allow a maximum of 3000 links and it is only possible to do shortest and fastest routes and a simple isochrone.
Installed files
RouteFinder6.mbx: Main Mapbasic application
rwnet4.dll: routing library
RFIcons.dll in 32-bit version
FILELib.dll in 64 bit version
RouteFinder6.chm: This document
Icons folder
Used to display the menu items and for any symbol used to indicate restriction on a map.
EFAL folder
This folder allows the production of tables within RouteFinder.
In the 64 bit version these are all NativeX tables, however this means that the result tables cannot be used in a 32 bit version of MapInfo.
Settings folder
routefinderoptions.ini: Program options file
routefinder6.lic: license file, don't modify this
programerrors.log: Error log file (optional)
The settings folder can be opened from within RouteFinder.
Sample folder
The sample folder can be opened from within RouteFinder. This folder currently contains some Open Street Map data.
If you are a new user then we highly recommend you read the “Quick Start Guide” in the Help file.
If you were using a previous version of RouteFinder then please read the “Updating from RouteFinder 4” or “Updating from RouteFinder 5” as appropriate.